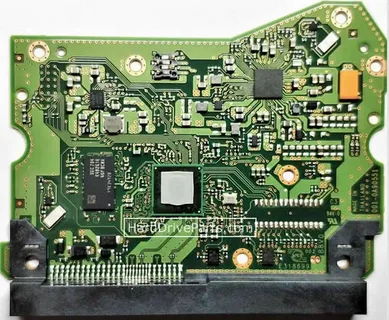
Replacing a hard drive’s printed circuit board (PCB) is a delicate process often undertaken to recover lost data or revive a malfunctioning drive. However, many users—both beginners and seasoned tech enthusiasts—make critical errors that can result in permanent data loss or drive damage. To ensure your replacement process goes smoothly, here are the top mistakes to avoid during hard drive PCB replacement.
1. Using an Incompatible PCB
One of the most common—and costly—mistakes is using a PCB that isn’t compatible with your hard drive. Even if two PCBs look identical, their firmware and unique ROM data may differ. Each hard drive has specific microcode embedded in its PCB, and using a mismatched board can render the drive unreadable.
Tip:
Always match the PCB part number, model number, and firmware version. In many cases, you may need to transfer the ROM chip from the old PCB to the new one.
2. Ignoring the Importance of ROM Chip Transfer
Many people assume that swapping the entire PCB will solve the problem without considering the ROM chip. The ROM chip stores calibration and drive-specific data essential for accessing your files. If this chip is not transferred, even a working PCB won’t help in recovering data.
Tip:
Use proper soldering tools and techniques if ROM transfer is required. Or better yet, consult a professional if you’re unsure.
3. Skipping Diagnostic Steps Before Replacement
Jumping straight into replacement without proper diagnosis is a major mistake. Not all hard drive failures are PCB-related. If the issue is with the read/write heads or platters, a PCB swap won’t solve it and may even worsen the damage.
Tip:
Listen for telltale signs like clicking noises, spinning issues, or burning smells to confirm PCB failure before proceeding.
4. Lack of Proper Tools and Handling
Static electricity, improper tools, or poor handling can destroy delicate electronic components on the PCB. Touching circuits with bare hands or working in an ungrounded environment can lead to electrostatic discharge (ESD), frying the board.
Tip:
Use an anti-static wrist strap, non-magnetic screwdrivers, and work on an ESD-safe surface. Store components in anti-static bags when not in use.
5. Overlooking Backup and Data Protection
Attempting a PCB replacement without backing up other working drives is risky. If the replacement fails, it could complicate future data recovery attempts.
Tip:
Always create backups when possible. If the data is valuable, consider consulting a professional data recovery service before attempting any repairs.
Conclusion
Performing a hard drive PCB replacement is not just about swapping circuit boards—it’s a precise, sometimes complex operation that requires attention to detail. The top mistakes to avoid during hard drive PCB replacement include using incompatible PCBs, skipping the ROM transfer, ignoring diagnostics, handling the board improperly, and neglecting data backup. Avoiding these pitfalls will increase your chances of a successful recovery and prevent further damage to your drive.
Whether you’re a tech enthusiast or a professional, understanding these top mistakes to avoid during hard drive PCB replacement is crucial to preserving data and maintaining drive functionality.


